I'm excited to continue this little series of guest posts with you -- creative minds from near and far, who have focused their ideas on red, just for us. Today, we're welcoming Terri of The Mommy Shop,
who has put together a tutorial for a stylish and useful sewing project that's perfect to make as a gift for just about anyone!
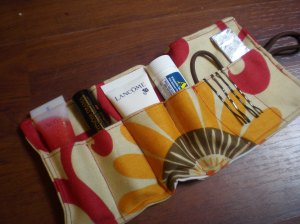
Supplies:
- 2 pieces of fabric 5" by 9"
- 1 piece of fabric for the pocket 3 1/2" by 9"
- thread
- a hair band
- sewing machine
- scissors
First you want to take your 3 1/2" by 9" piece of fabric and hem the top under half an inch so it looks nice and finished off.

Next, lay the 3" by 9" piece on top of one of your 5" by 9" pieces. You will want to make the bottom edge of both fabrics line up as shown below.
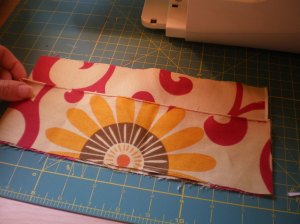
Once you have them lined up, you will sew straight lines down the front of the fabric to create pockets. This is where you have some flexibility. I sewed six pockets because I had specific things in mind that I wanted my kit to hold. If you know you have more stuff you may want to use a little bit longer piece of fabric and sew more pockets. Or, if you know you have an item that will need a bigger pocket, you could sew one large pocket and four small ones, etc. I decided on six pockets, each about one-and-a-half inches apart.
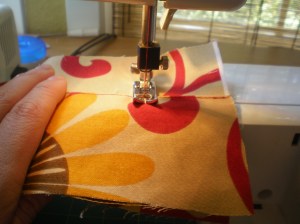
At the top of each pocket, I did a quick back stitch to make sure that the thread will not unravel. Another little trick to save time and thread is to not cut your thread between each line. Simply make sure your needle is up, raise the sewing foot and scoot your fabric over the the next line. I usually go down one line, up the next, then back down again and so forth. Once you are finished, you can go back and cut the thread between each pocket.
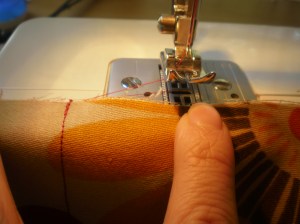
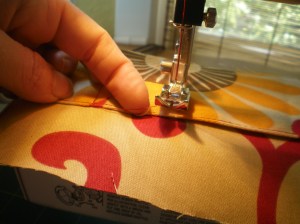
Once you have all your pockets stitched, you are half way done.
Next, you will lay the second 5" by8" piece on top of the first 5" by 8" piece with the colored sides of the fabric touching one another.
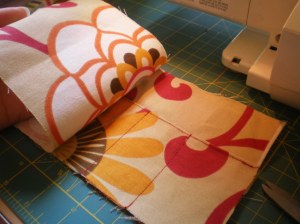
Now sew down the bottom, around one side and across the top leaving one end open.

Once you have done that, you will turn the fabric inside out. It may be helpful to use something like a crotchet hook or pen to push the corners all the way out.
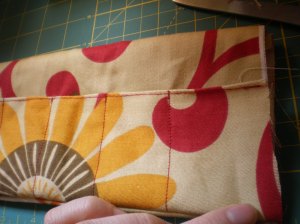
At this point you should still have one open end.
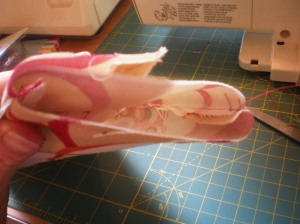
You will want to turn the open end in and pin the rubber band inside the pocket it forms.

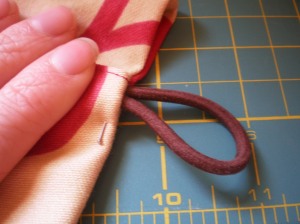
Now you are on your last step!

Simply sew around the entire rectangle.


And you are done! These are so easy and affordable to make. I think these would make great gifts for a bride, bridesmaids, girls going to prom, stocking stuffers for all the ladies in your family etc. Feel free to add your own suggestions on things to fill it with too! Mine carries my essentials: mascara, lipgloss, mini lotion, a stick of gum, a band aid, bobby pins, a rubber band and a travel kit of Advil!
If you want to make one of these for your kids you can make the pockets about an inch apart and use it for a crayon roll-up, too.
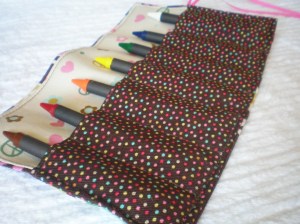
Thanks, Terri! It looks great! Looks like my family know what to expect in their stockings now...


6 comments:
What a cute project - and you're right, it would be a great stocking stuffer! Thanks for sharing this Terri!
Lovin' it! :)
http://www.ehx.com/member/277168/
i want to download powerdvd for free and without viruses where can i down load it from??
Thanks Jadyn and Kathryn I use mine all the time! And thank you Astrid for letting me do a post. We can't wait to hear about how your traveling is going.
Calorimetry Uriel Nauenberg University of Colorado Vishnu NICADD Zutshi Dan Notre Dame Karmgard Andy White U.Texas at Arlington Jose Repond Argonne National Lab Yasar Onel The Viscosity As measured on a Brookfield Viscometer Model RVF, Spindle #2 at 20 rpm Other than this, the website is also sells uniforms, magazines, gears, books as well as different kinds of DVDs. Portable Ultrasonic Clamp-On Flow Meter for Compressed Air and Thermal Energy - G601 CA Energy.
That`s a great idea! I think I`m sharing this with my readers at thegreatzambini.com
Post a Comment