Showing posts with label tutorial. Show all posts

Wednesday, February 25, 2015

Tea and Scones: A Quilt Tutorial

 photo DSC_0366.jpg

I remember, clearly, the first time I touched Liberty fabric.

My Mum and I were sitting at her big farmhouse table in her kitchen in Suffolk, planning the quilts we were going to make that summer together. I had brought some cotton prints over in my suitcase for us to use, and Mum disappeared upstairs and came down with a little cardboard box, in which a dozen or so carefully-folded Liberty fabrics sat. "Do you think these would go, too?" she asked, setting them between us, and I remember that exact feeling of holding a square of the light and shimmery material with amazement and disbelief that anyone would allow me to use such beautiful fabrics.

Allowing myself to actually sew with my favourite fabrics -- such an important part of letting the joy in the creative process shine through -- began that summer, with the little cardboard box of Liberty fabric that my Mum shared with me. And, I've never looked back. I no longer hold back a pile of fabric on my shelf for later, for one day, for some future time when I'm finally "good enough". Right now, wonky seams and all, is good enough.
   photo DSC_0405.jpg

And what a pleasure it is to sew with beautiful, high-quality materials. This quilt, which I've named "Tea and Scones" in honour of the jam or cream-filled blocks, uses a selection of my favourite Liberty Lawn fabrics, in a pattern which is designed to use every last inch of a fat eighth cut. And I find that putting these prints together with solid fabrics is a lovely way not only to bring out the best in the Liberty prints, but also to put your own voice and style into the quilt with the hues and shades of the solids you choose.

So, throughout this pattern, while I have given the details and quantities of the fabrics I used, please feel free (or encouraged, even) to substitute in colours that speak to you. 

Ok, so grab your finest Liberty prints from the special place they are hoarded away, and let's get started!


 photo LibertyBlogHopButton.jpg
The Liberty fabrics for this post were provided by the "Give Me Liberty Club" -- a subscription service run by Westwood Acreswhich sends a beautiful selection of Liberty fabrics to members each month. 

Tea and Scones: Quilt Tutorial

Fabric Requirements:

5 fat-eighths of Liberty Lawn
1 yard white solid (Kona White)
1/2 yard pink solid (Kona Sangria)
1/4 yard grey solid (Essex Dyed Linen grey)
1/4 yard pale blue solid (Essex Dyed Linen blue)
1/4 yard turquoise solid (Essex Dyed Linen turquoise)
1/4 yard dark blue solid

 photo DSC_0396.jpg

Instructions:

1.
Cut your Liberty fabrics first. This pattern has been designed to use every single inch of a fat eighth cut of fabric, and so it is important how you make the cuts. First, lay the fat eighth strip out -- it will measure approximately 27" x 9 1/2". Measure 6 1/2" down from the top edge of the strip, and cut along the length of the fabric, so you have a strip that is 27" x 6 1/2". With the leftover, smaller strip, trim it to be 2 1/2" wide, so it measures 27" x 2 1/2".

Take the 6 1/2" wide strip of Liberty fabric, and cut it into 2 1/2" widths, all the way along -- this will give you ten strips.

Now take the 2 1/2" wide strip of Liberty, and cut 6 1/2" widths all the way down. These pieces will be the same size as those you have just cut (2 1/2" x 6 1/2"), but will have the pattern facing the opposite direction (horizontally as opposed to vertically) -- this will give you a further four strips, for a total of fourteen strips from each fat eighth of Liberty.

You should end up with 70 strips of Liberty fabric, each 2 1/2" x 6 1/2".

Note: In this quilt, I have used only 50 of the strips of Liberty fabric, and have given the exact quantities of each solid fabric used below. However, there is no need to use these quantities exactly -- this quilt pattern will work whatever ratio of prints to solids you choose to use.

 photo DSC_0323.jpg

2. Now cut your solid fabrics. You will need a total of 174 solid strips.

In this quilt, I used:

30 strips of Kona Sangria
84 strips of Kona White
14 strips of grey Essex Dyed Linen
25 strips of light blue Essex Dyed Linen
7 strips of turquoise Essex Dyed Linen
14 strips of navy solid

Note: You will use 192 of these strips (Liberty + solids) to construct your blocks, and the leftover 32 will be used later to create a border. 

You will also need to cut four squares 2 1/2" x 2 1/2" for the border corners, in any colour you like.

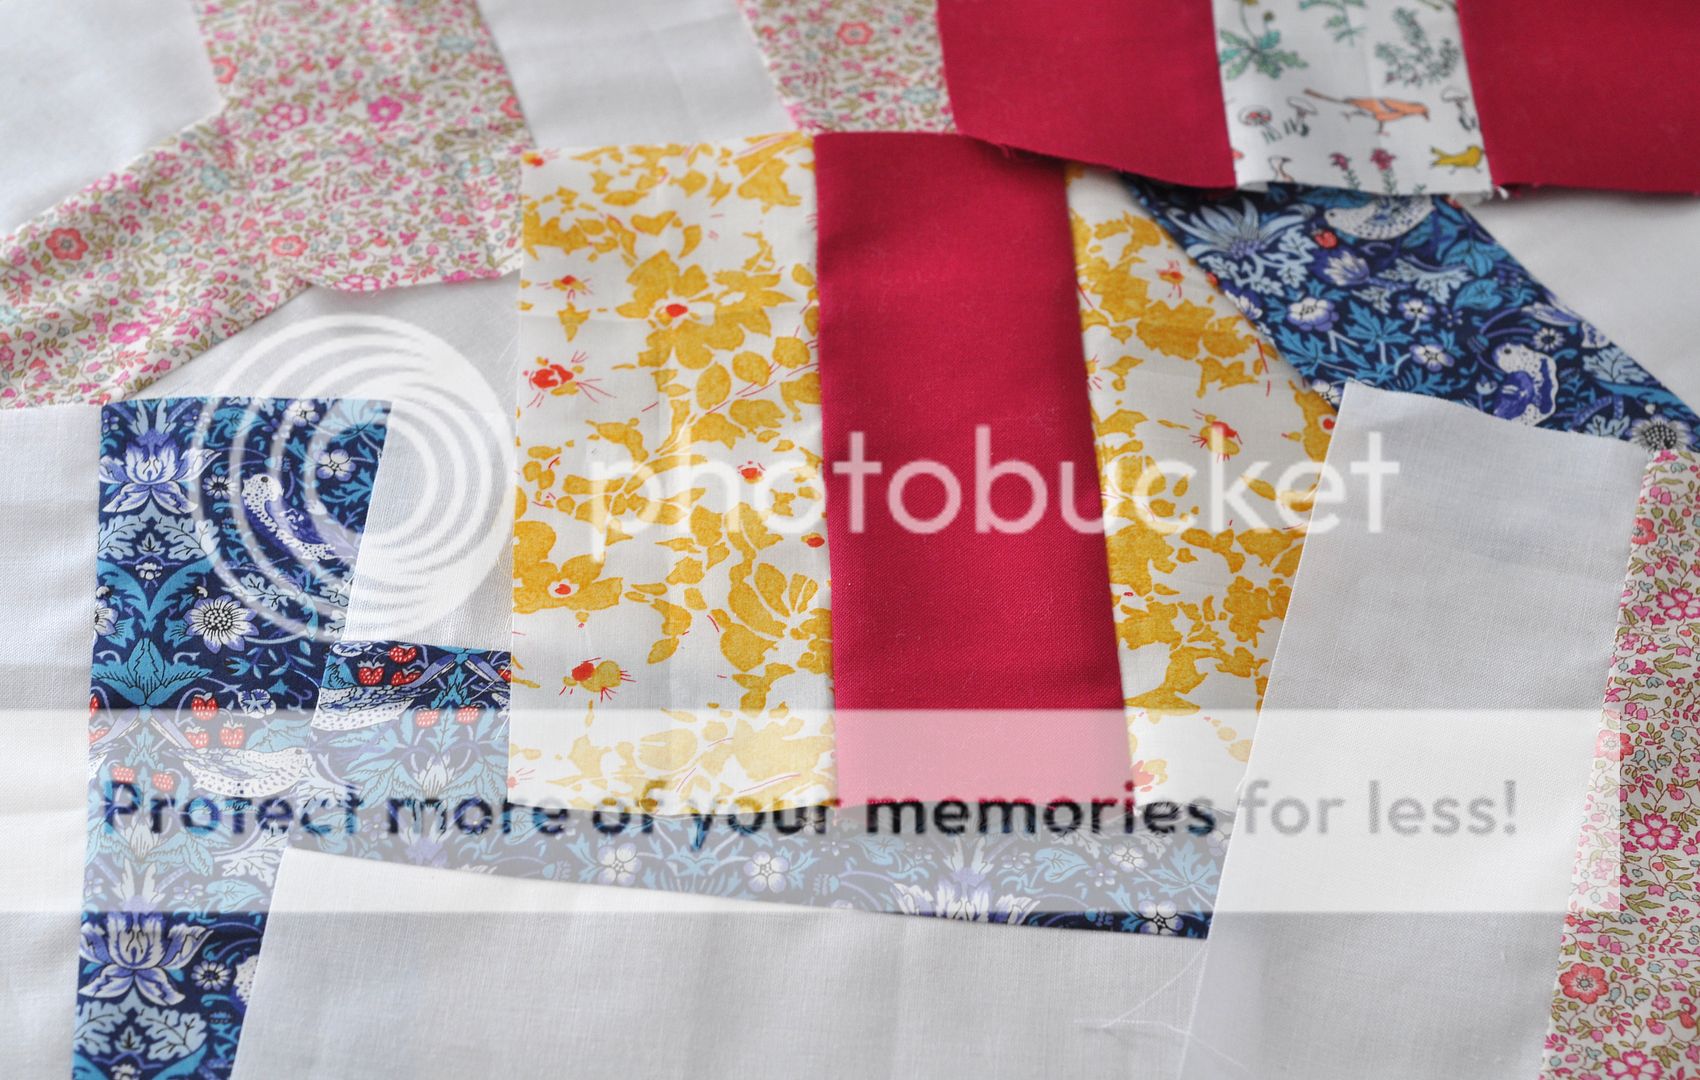
3. Now, begin to lay out your "scones" -- a pair of the same fabrics on either side of a contrasting fabric. The Liberty prints can go in the middle or on the outer edges of the block -- I found that making both styles of block created the look I wanted.

Let yourself be guided by colours you love together. Pick shades of solid fabric that enhance the colours in the Liberty prints you have chosen.
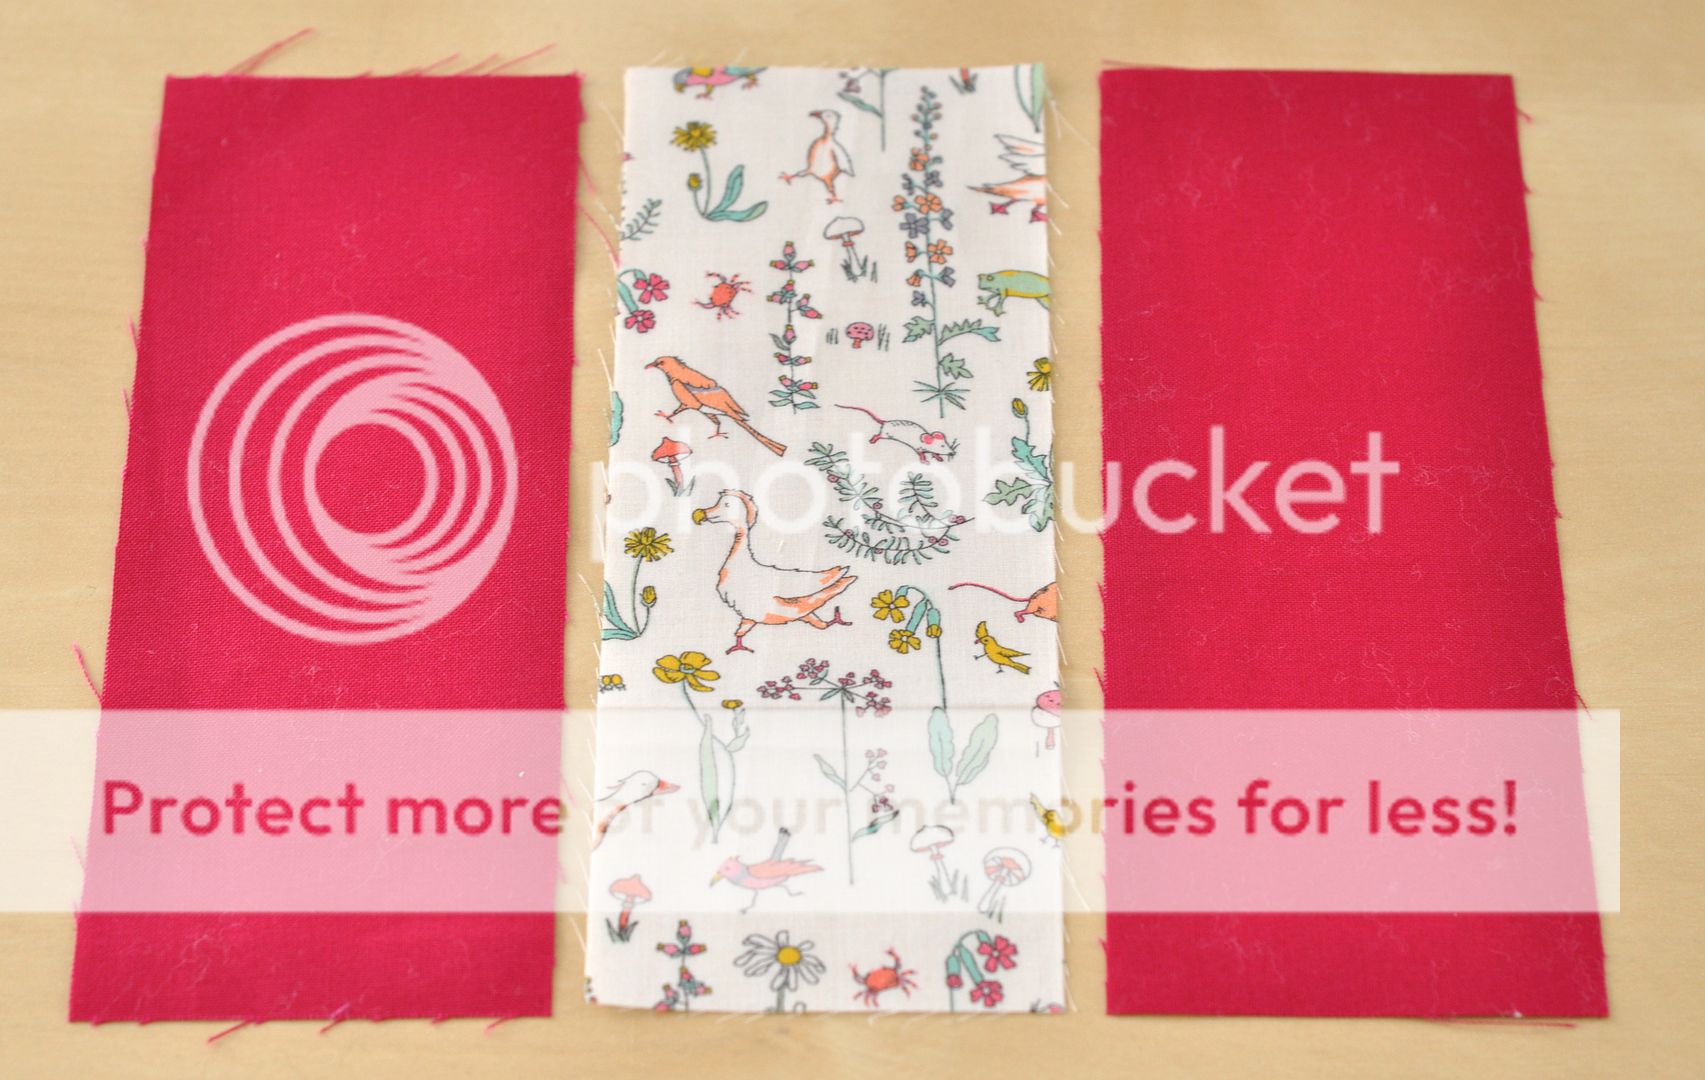
 photo DSC_0325.jpg

4. Assemble your "scones" by sewing the middle strip to one of the edge strips, (using 1/4" seam allowance), and then attaching the second edge strip to the other side of the middle strip. Iron all seams flat.

You will need to assemble 64 blocks to make this 51" x 51" quilt.
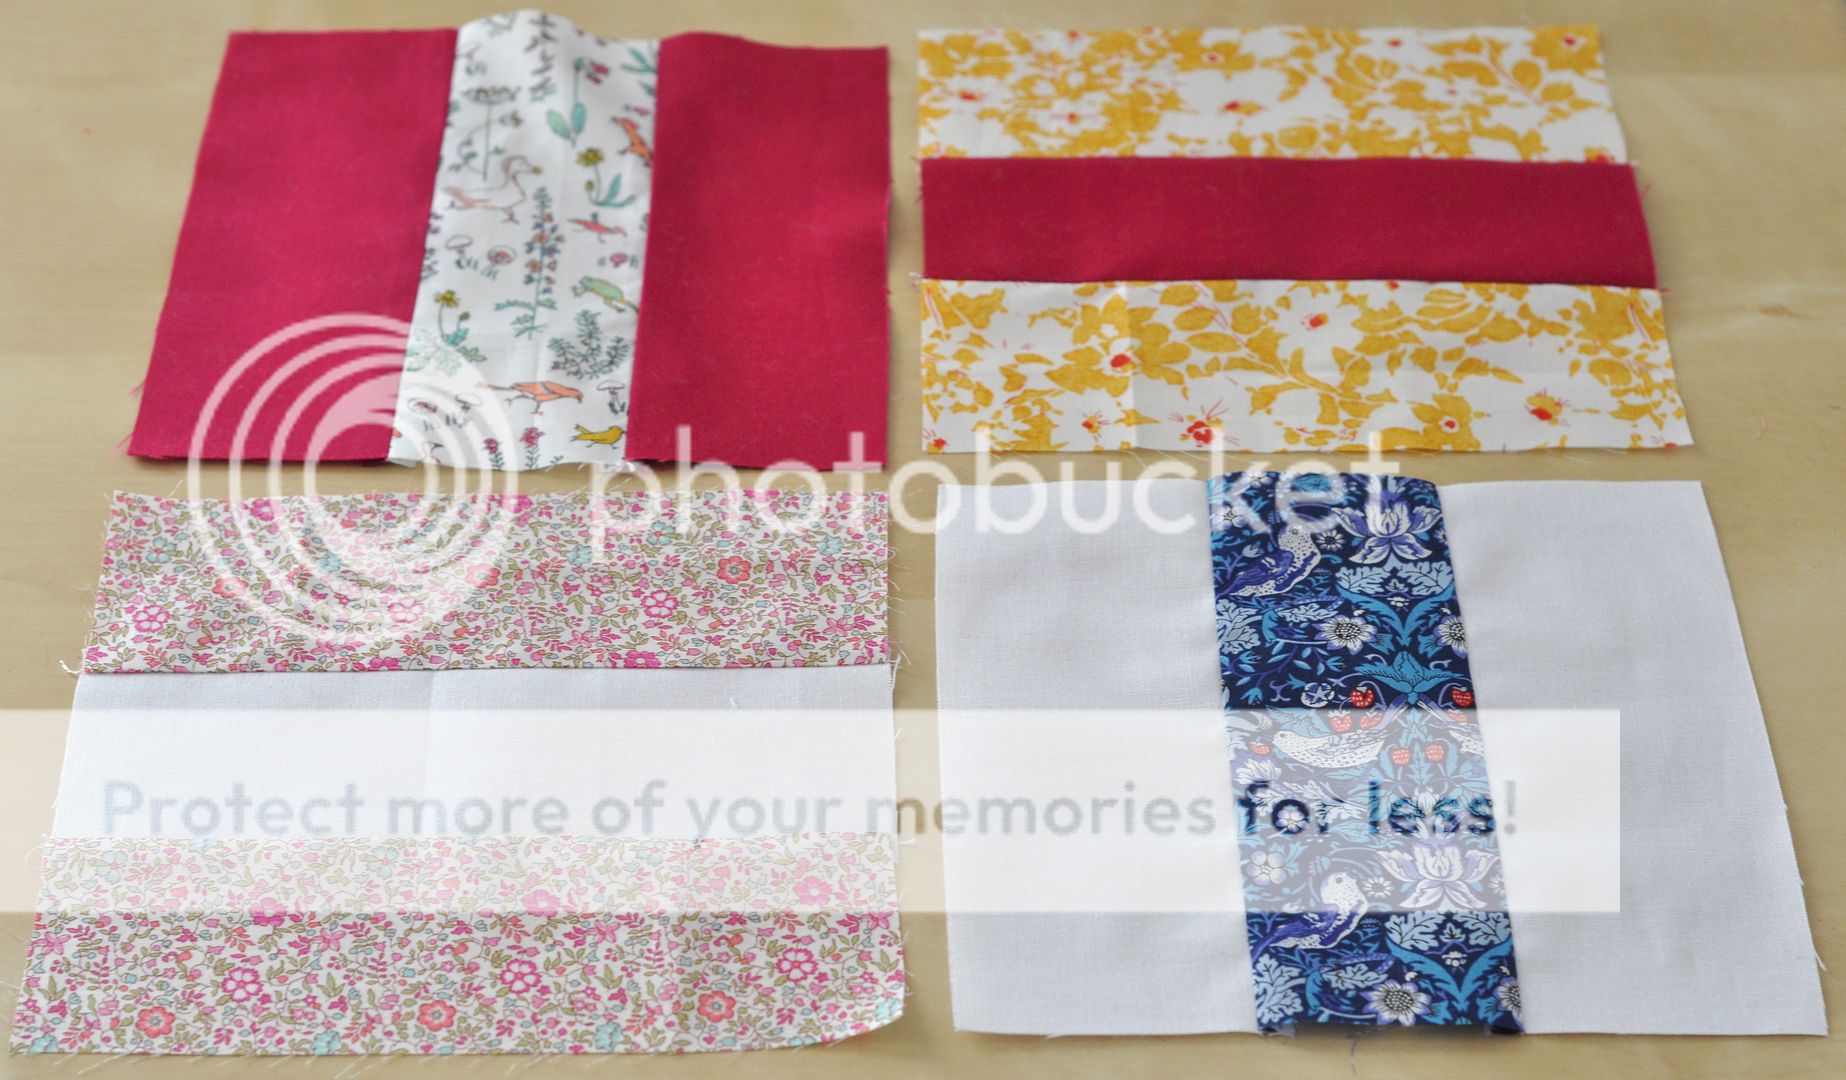
 photo DSC_0317.jpg  photo DSC_0328.jpg

5. Now, you can lay out your blocks, using a design wall or a larger empty floor space. The blocks are laid out in an alternating fashion -- the strips point vertically in the first, horizontally in the second, vertically in the third, and so on.

Hint: Place the most eye-catching, the brightest and darkest colours where you want them first, as these will create the movement and interest in your final quilt. Calmer and more neutral colours can then be filled in around them.

 photo DSC_0320.jpg

6. Once you are happy with the placement of your blocks, you can place the border strips around the edges. You will need 32 strips, plus four pieces 2 1/2" x 2 1/2" for the corners.

Tip: any off-cuts or cutting mistakes from your strip-cutting can be trimmed and used as the corners!

Place eight 2 1/2" x 6 1/2" strips along each edge. Their edges should line up with each block. You may want to use solid white strips to go alongside blocks with darker solids in them, and use contrasting colours in general on the borders so they compliment rather than confuse the design.

Place one 2 1/2" x 2 1/2" square in each corner.

 photo DSC_0332.jpg  photo DSC_0337.jpg

7. Sew the top and bottom border pieces together, each as a long row, beginning and ending with a corner square.

 photo DSC_0347.jpg

8. And then sew the quilt blocks together -- again, sewing each of them as a long row first, beginning and ending each row with a border strip.

 photo DSC_0346.jpg

9. Iron the seams open, and then sew your rows of blocks together, in order, to form your quilt top.
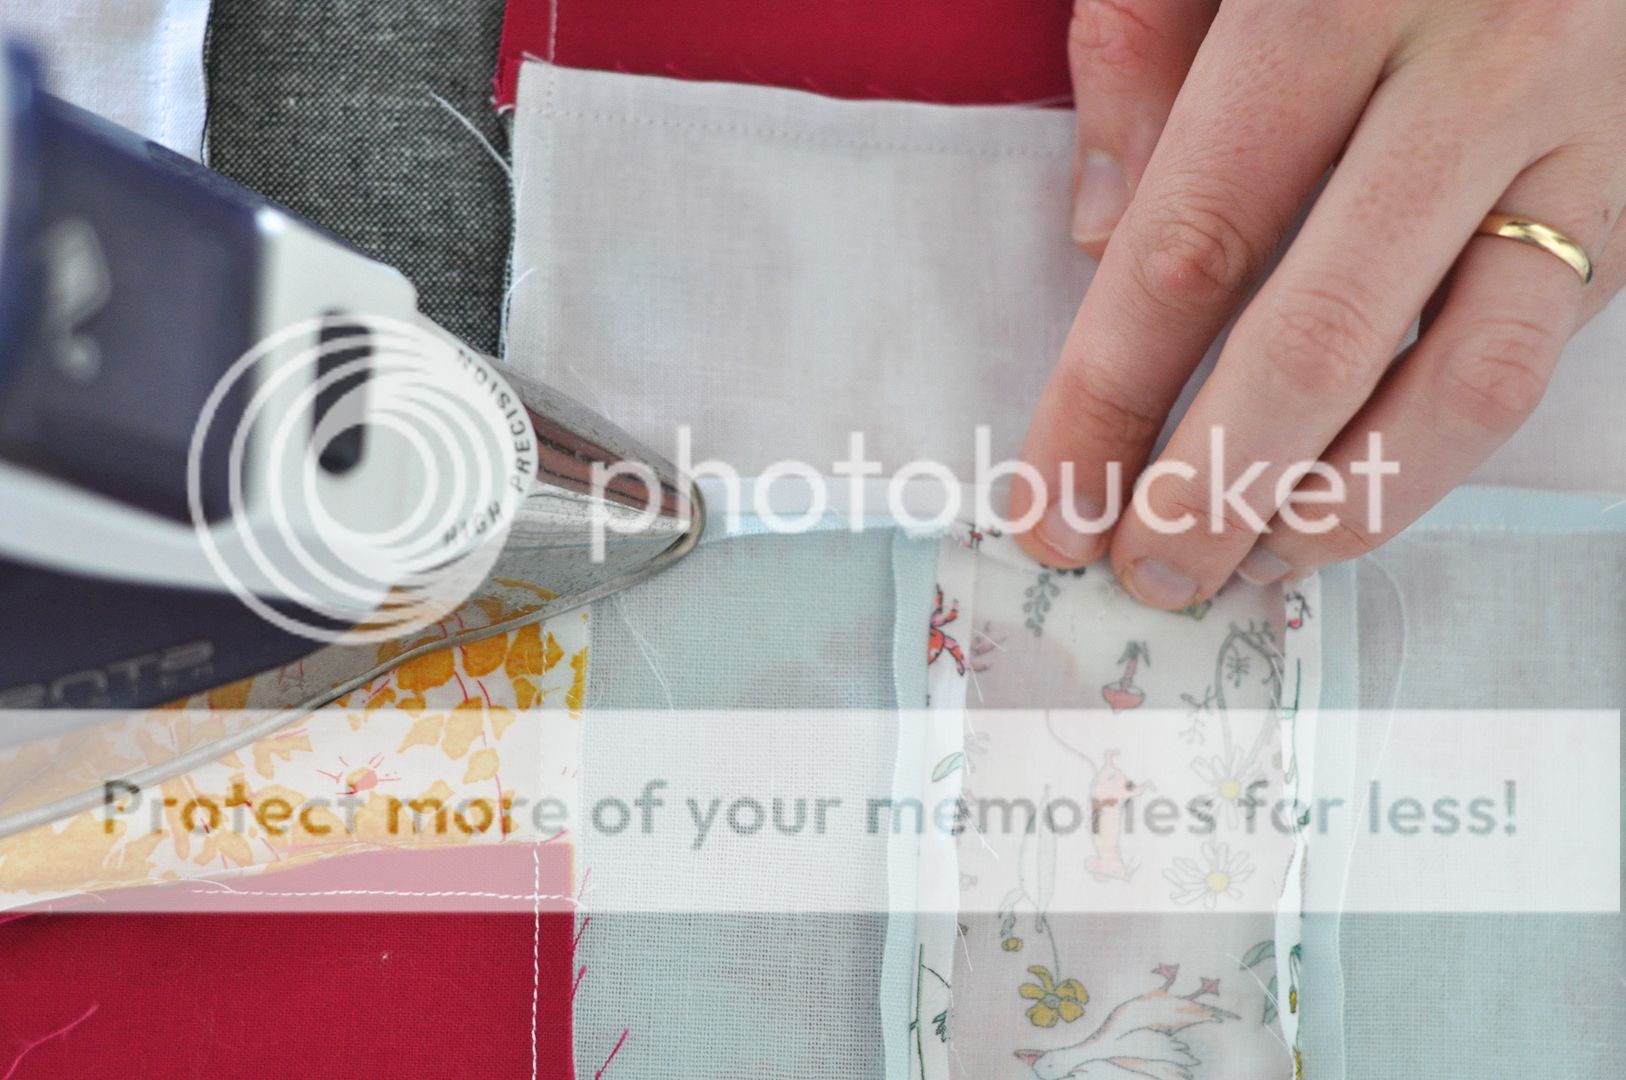
   photo DSC_0353-1.jpg

10. Back, baste and quilt your design. For this pattern, I love long, straight lines of quilting stitches, 1/2" apart, across the whole top.

 photo DSC_0397.jpg

Now, enjoy your quilt, preferably on a Spring day, with scones and tea!
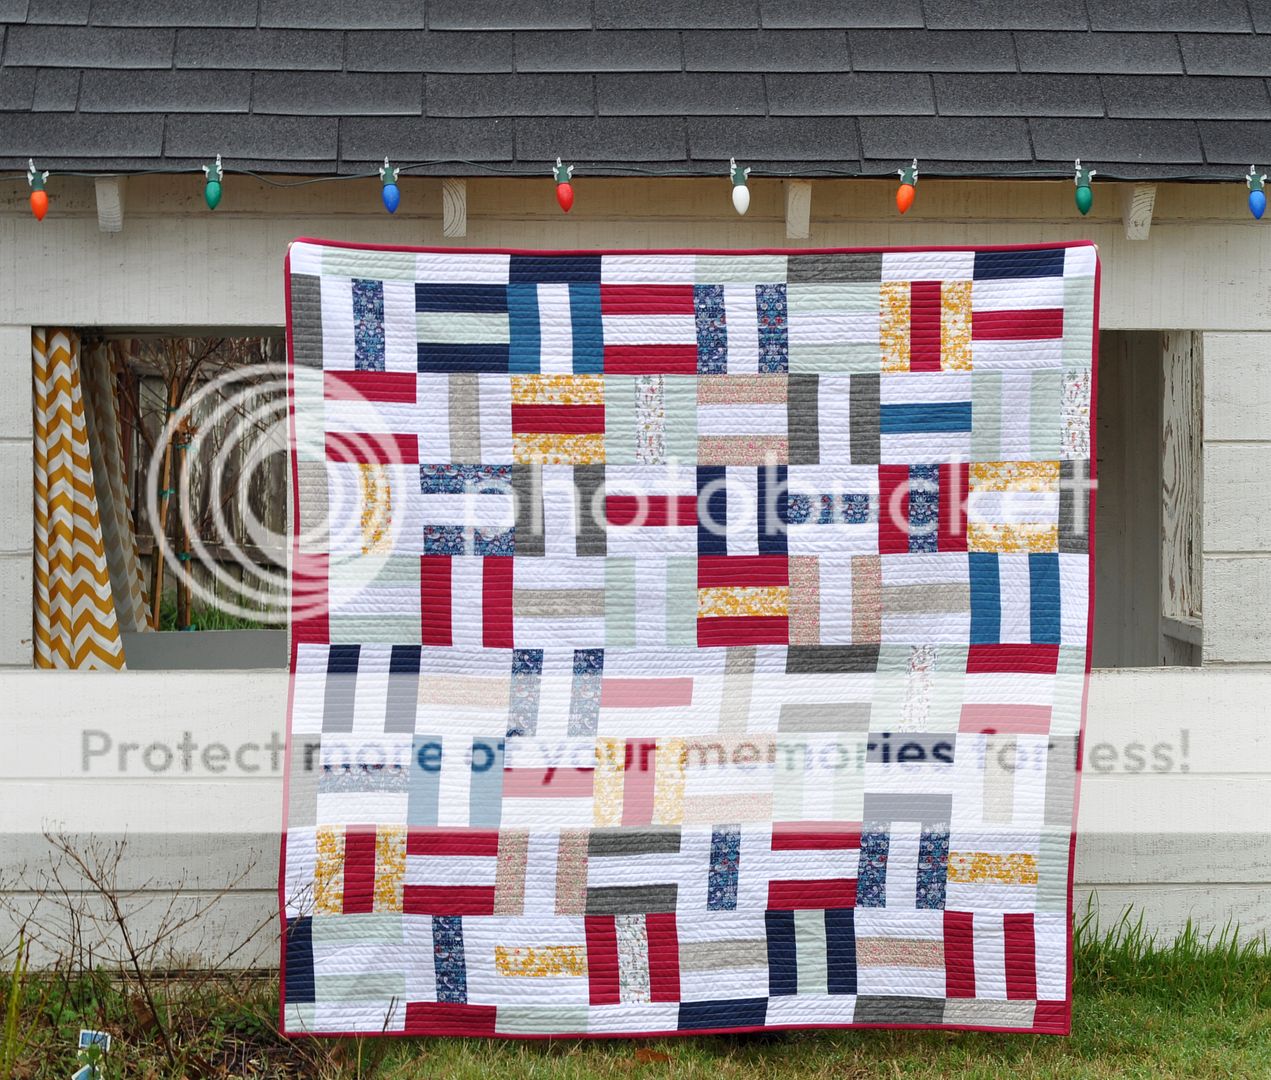
 photo DSC_0367.jpg

 photo DSC_0384.jpg

For more ideas on how to put your lovely Liberty fabrics to use, pop over to the folks below over the next fortnight to see what they have created:

February 24th: Kick Off! Amanda at A Crafty Fox
February 25th: Astrid at Red, Red Completely Red
February 26th: Svetlana at Sotak Handmade
February 26th: Andy at A Bright Corner
February 27th: Chase at Quarter Inch Mark
March 1st: Emily at Simple Girl Simple Life
March 2nd: Ashley at Film In The Fridge
March 3rd: Lee at Freshly Pieced
March 4th: Audrie at Blue is Bleu
March 5th: Amanda at A Crafty Fox

Monday, December 5, 2011

{write on: an easy handmade gift for men}

I'm rubbish at thinking of presents for men. And men who don't use electronics are even more of a challenge. What can you make them a cover for?

Inspired by my friend Terri's crayon rolls for kids, this grown-up version gets its modern style from all the grey felt accessories I keep seeing this year, like this glasses case. With a little personalisation, it makes a lovely gift for the writer (or crossword-puzzler) in your life.

Want to make one yourself? Here's how.

Materials:
Grey felt
Small strip of twill tape (to stamp on)
Rubber stamps and ink
Thread


From the grey felt, cut two rectangles 8" by 12", and one rectangle 4" by 12".

Onto a 3 1/2" strip of twill tape, stamp the lucky person's name using permanent ink (I use StazOn). I couldn't bear to pass up the rhyme for my granddad, Kenneth, and I hope that if you've got a Ben, Glen or Sven in your family, you'll make them a pen roll, too.

Sew the twill tape along one short edge of the small felt rectangle, using a zig-zag stitch around the edge.


Pin the small felt rectangle to the bottom side of one of the large felt rectangles, lining up the edges. Make sure your twill tape label is visible. Sew straight lines, using running stitch, across the width of the small felt rectangle, about an inch apart. These will hold the pens in place. Sew a couple of backstitches at the start and end of every row, to prevent the stitches unravelling.

Tip: Between rows, lift up the needle and foot, but don't snip the thread -- just begin the next row. You can go back and do all the snipping later, and save time and thread.

Place the two felt rectangles that you've just sewn together on top on the third rectangle. Place a large elastic band (hair ties work well) in between the two large rectangle layers, half way down one of the shorter sides. Pin in place, so that a good 1/2" of elastic band is hidden inside.

Sew all the way around the outside edge of the roll, making sure to go through all the layers and the elastic band.

Now fill it with pens (or a single, special pen), and roll it up, starting with the end without the elastic band. Slip the elastic over the top of the roll, and you're ready to go!

P.S. In need of other gifts? Check out CMP's and WV's Holiday Gift Guides, and see if you can spot some familiar (Polaroid-framed) faces...

Tuesday, November 1, 2011

{pinterest challenge: ruffles}

This tutorial -- seen on, you guessed it, Pinterest -- was for a ruffled tote bag to take Trick or Treating. With a different set of colours, though, it was easily adapted for a new season of celebration.


Don't know how to make ruffles? You will after sewing this bag. (Note: you'll probably also have discovered how NOT to do it!) Tilly has been trotting around with ours today, and I love how it looks as if she's wearing a floor-length flamenco dress!


P.S. Looking for a free Christmas present? I'm giving away a new piece from my shop over here -- stop by, leave a comment, and win yourself an original bit of Red Red.

Tuesday, October 25, 2011

{confessions of tillyless tuesdays}

I was just going to show you the sweet little baby head with its sweet little baby mullet and the progress on tilly tuesdays: volume II, but then I decided I should tell you the truth. The truth is, I haven't consciously taken a photo of Tilly on a Tuesday for sixteen weeks. There have been plenty of photos, and there have been the usual amount of Tuesdays, but if they've occurred together, it's been purely by chance.

If you remember, tilly tuesdays: volume one was a handmade book of photographs, taken each Tuesday of Tilly's first year. Ah, younger Astrid, and her need for perfection. Once, late on a Tuesday evening, she did the unthinkable -- the most taboo act of motherhood -- she woke a baby just for an authentic Tuesday photo. (Yes, I can hear your collective gasp, echoing around the world... don't worry, I've learnt my lesson.)


But earlier today, wanting to read an email without being asked to see "beh-bee? beh-bee?" (and then screamed at when the email had no baby in it), I pulled down volume one. Fifty-two weeks of beh-bee, in handy sit-on-the-floor format. Peace. And then I realised --  today is Tuesday, and I hadn't yet taken a photo. I didn't take a photo last Tuesday, the Tuesday before, or any of the fourteen great-great-grand-Tuesdays that came before that.


Luckily, present-day Astrid cares very much less about perfection. "Ah, close enough," was my mantra of the afternoon photo sorting, along with "If I tell myself enough that the dates are accurate, I won't know the difference." Sorry, future Astrid, it doesn't sound like I've got much faith in your memory. At least I've labelled the book for you so you'll know which child is in the photos. You're welcome.

Okay, enough words. You're here for the photos, I know.


While the first volume was full of milestones like Tilly smiling or eating food for the first time, this year the firsts are of a rather different nature. Two months ago: the first time she sailed around a miniature version of the world in a Lego boat. A month ago: the first time she picked up a ladybird. A week ago: the first time she really played with a friend, rather than just trying to hit him on the head with toys (sorry, Ewan). 

And that is why I have to keep it up -- so that all these photos don't fade into the jumble of "when she was little," but get to tell their stories and take their place in this weekly history of a person. Well, that, and I love the thought of teenage Tilly going to the photobooth each week to take her picture, twenty-year-old Tilly taking blurry self-portraits on a 'vintage' iPhone, eighty-year-old Tilly sleeping in a room full of filing cabinets (a la Bill Cunningham) filled totally with Tuesday photos... 

...let's see, 80 years x 52 weeks = 4160 photos. Okay, she'd probably just have them on a CD. 

Wednesday, September 21, 2011

{a ninetieth birthday in photos}

It's the end of a long day of party poppers, pass the parcel, and Polo mints -- a ninetieth birthday party with personality. As all of our energy has been used up, scrambling to get the biscuits baked before the old folks arrived for their lunch, I'm simply going to show you some photos and go to bed. (With a leftover biscuit... or two!


Thursday, August 25, 2011

{emergency purse kit tutorial -- by terri}


I'm excited to continue this little series of guest posts with you -- creative minds from near and far, who have focused their ideas on red, just for us. Today, we're welcoming Terri of The Mommy Shop
who has put together a tutorial for a stylish and useful sewing project that's perfect to make as a gift for just about anyone!

Hello all, my name is Terri and I am a huge fan of Astrid's style and creativity over here at Red Red Completely Red. I was thrilled when she asked me if I would be willing to do a guest post for her while they are off traveling. I absolutely love sewing, crafting and using my spare time to come up with new creations for me, my kids and my etsy shop.  However, as a stay-at-home mom of a 2 year old and 1 year old, projects that are expensive,  non-practical, and take more time than what I can finish during the 30 minute window my kids are both asleep at the same time are not at the top of my list.  So today I am so excited to share with you a tutorial for an inexpensive, very practical and time-efficient project I created.  I call it the emergency purse kit!


Supplies:
  • 2 pieces of fabric 5" by 9"
  • 1 piece of fabric for the pocket 3 1/2" by 9"
  • thread
  • a hair band
  • sewing machine 
  • scissors
Skill Level: Beginner.  I am not always the best at explaining things so I like to include a lot of pictures.  I hope that you find this to be both simple and fun!

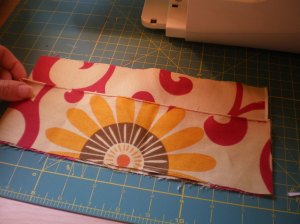
First you want to take your 3 1/2" by 9" piece of fabric and hem the top under half an inch so it looks nice and finished off.


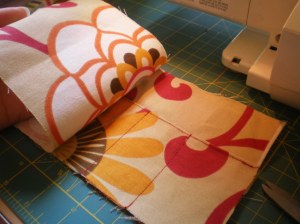
Next, lay the 3" by 9" piece on top of one of your 5" by 9" pieces.  You will want to make the bottom edge of both fabrics line up as shown below.


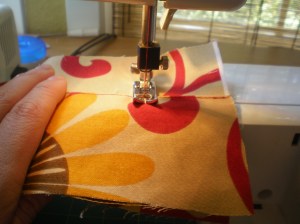
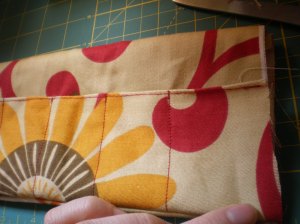
Once you have them lined up, you will sew straight lines down the front of the fabric to create pockets.  This is where you have some flexibility.  I sewed six pockets because I had specific things in mind that I wanted my kit to hold.  If you know you have more stuff you may want to use a little bit longer piece of fabric and sew more pockets.  Or, if you know you have an item that will need a bigger pocket, you could sew one large pocket and four small ones, etc. I decided on six pockets, each about one-and-a-half inches apart.


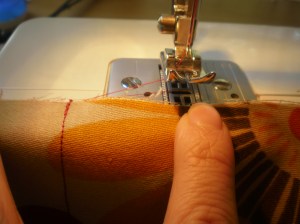
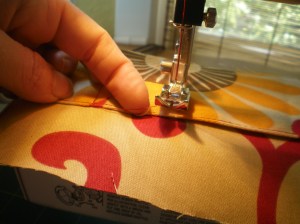
At the top of each pocket, I did a quick back stitch to make sure that the thread will not unravel.  Another little trick to save time and thread is to not cut your thread between each line.  Simply make sure your needle is up, raise the sewing foot and scoot your fabric over the the next line.  I usually go down one line, up the next, then back down again and so forth. Once you are finished, you can go back and cut the thread between each pocket.


Once you have all your pockets stitched, you are half way done.
Next, you will lay the second 5" by8" piece on top of the first 5" by 8" piece with the colored sides of the fabric touching one another.


Now sew down the bottom, around one side and across the top leaving one end open.


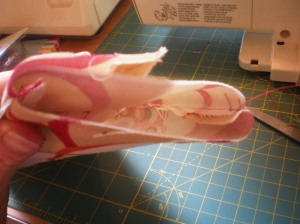
Once you have done that, you will turn the fabric inside out.  It may be helpful to use something like a crotchet hook or pen to push the corners all the way out.


At this point you should still have one open end.


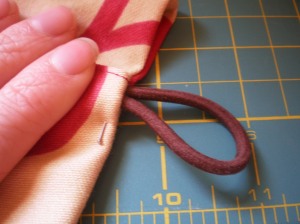
You will want to turn the open end in and pin the rubber band inside the pocket it forms.


Now you are on your last step!


Simply sew around the entire rectangle.


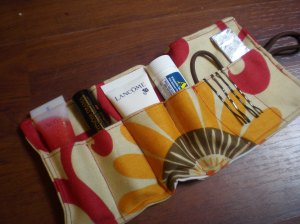
And you are done!  These are so easy and affordable to make.  I think these would make great gifts for a bride, bridesmaids, girls going to prom, stocking stuffers for all the ladies in your family etc.  Feel free to add your own suggestions on things to fill it with too!  Mine carries my essentials: mascara, lipgloss, mini lotion, a stick of gum, a band aid, bobby pins, a rubber band and a travel kit of Advil!
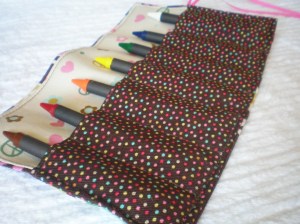
If you want to make one of these for your kids you can make the pockets about an inch apart and use it for a crayon roll-up, too.


Thanks, Terri! It looks great! Looks like my family know what to expect in their stockings now...